 |
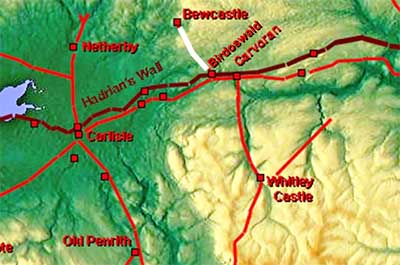
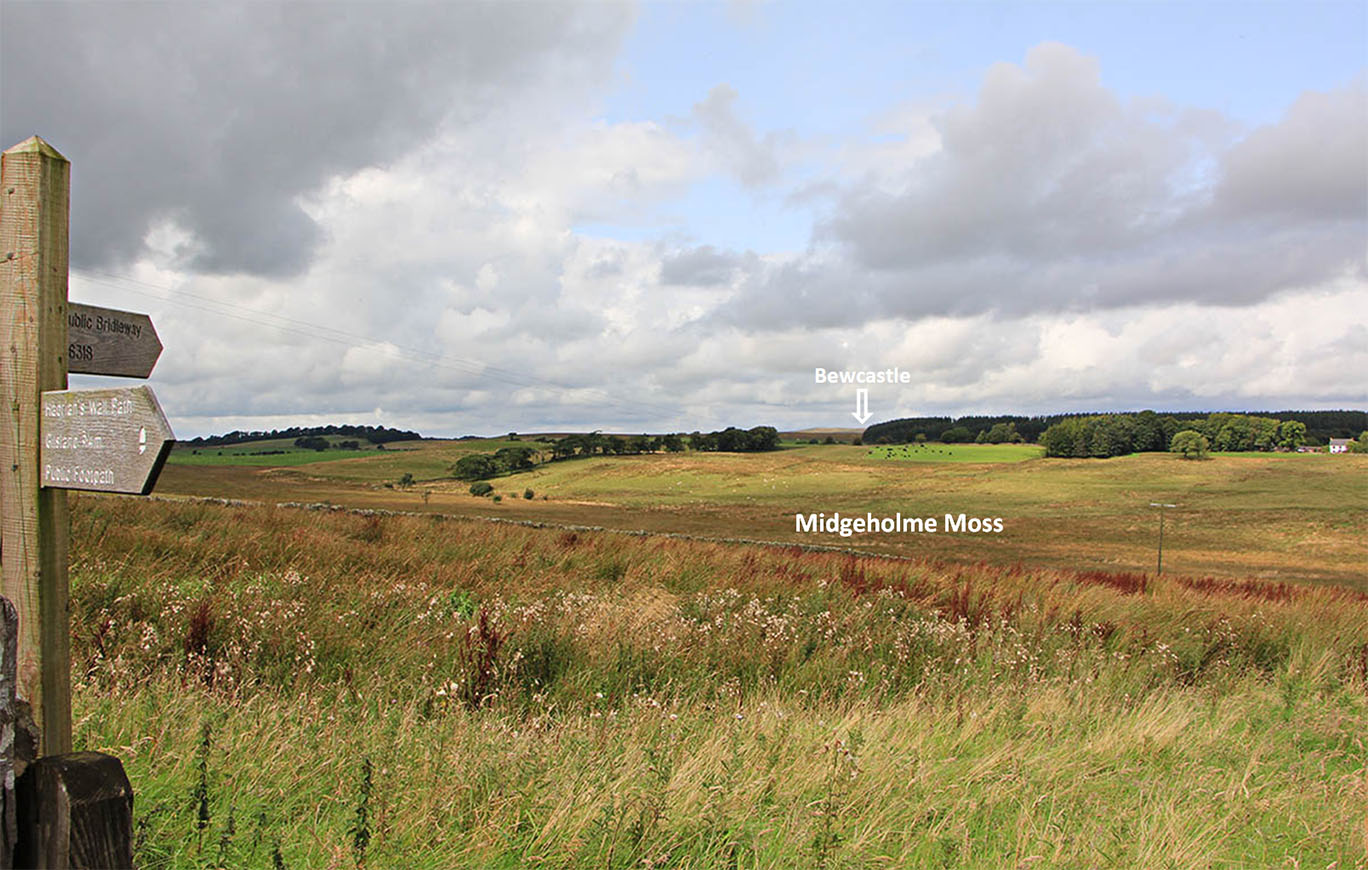
The Roman Road from Birdoswald to Bewcastle, Margary 865A short 6 mile road linking Birdoswald to the outpost of Bewcastle. A quote from Margary set me thinking: "no trace has been found in the first 1/2 mile". The first half mile was supposed run in a straight line from the north gate of Birdoswald fort across Midgeholme Moss - a large boggy area that actually provides protection to the fort but is no help to road builders. Lidar was only available for half way across the moss but it too showed no evidence for a direct road. This road was originally traced by Mr. Maughan c. 1850s and examined by Haverfield in 1896/7. Haverfield's comments are particularly relevant: "For the first half mile north of Birdoswald the road has vanished in soft ground: it was apparently invisible in Mr. Maughan's time, and certainly could not be found by us." The explanation was obvious. The Roman road engineers didn't go through the bog - they followed dry land around the edge of it - very sensible. Once clear of this obstacle they returned to the main alignment for Bewcastle, a typical Roman strategy.
Bewcastle appears to be a genuine Roman cul-de-sac. I could find no evidence for a road heading north or one west towards Netherby. Note this road should not be referred to as Maiden Way as it sometimes still is today. That name applies to Kirkby Thore to Carvoran via Whitley Castle only and as long ago as 1929, Collingwood explained why it should not be applied to this road - basically they are two separate roads.
|
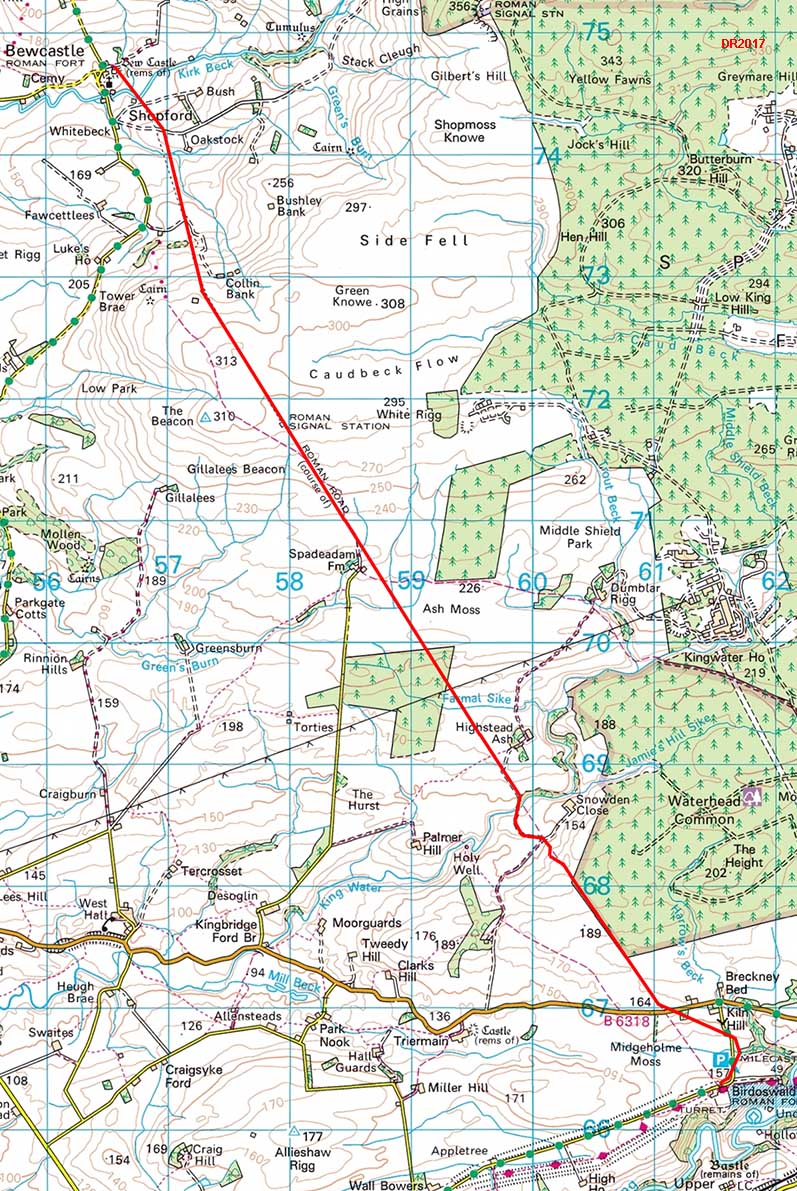
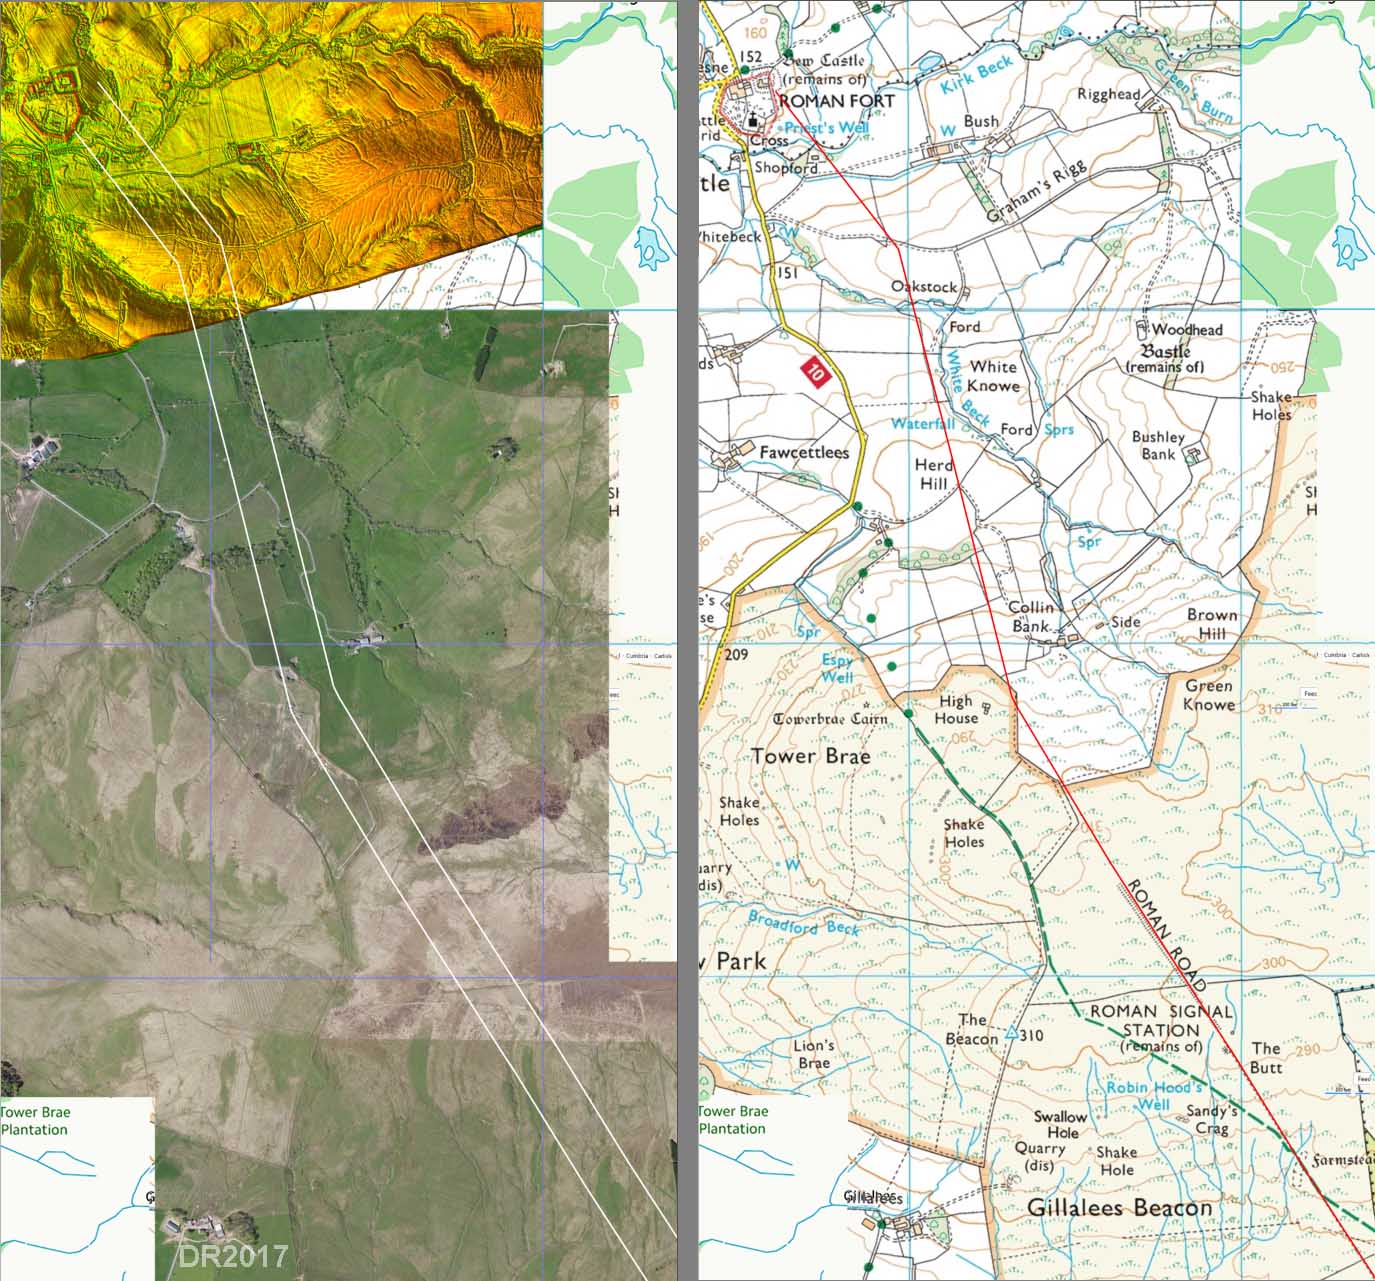
Route Map Simple arrangement of one long alignment followed by two short straights to get to the east gate of Bewcastle fort. Note although the main straight is set out from Birdoswald north gate the actual road only adopts this alignment after it has circumnavigated Midgeholme Moss, north of the B6381 - see below. There is another kink to negotiate the valley of King Water. |
Click for larger view |
 |
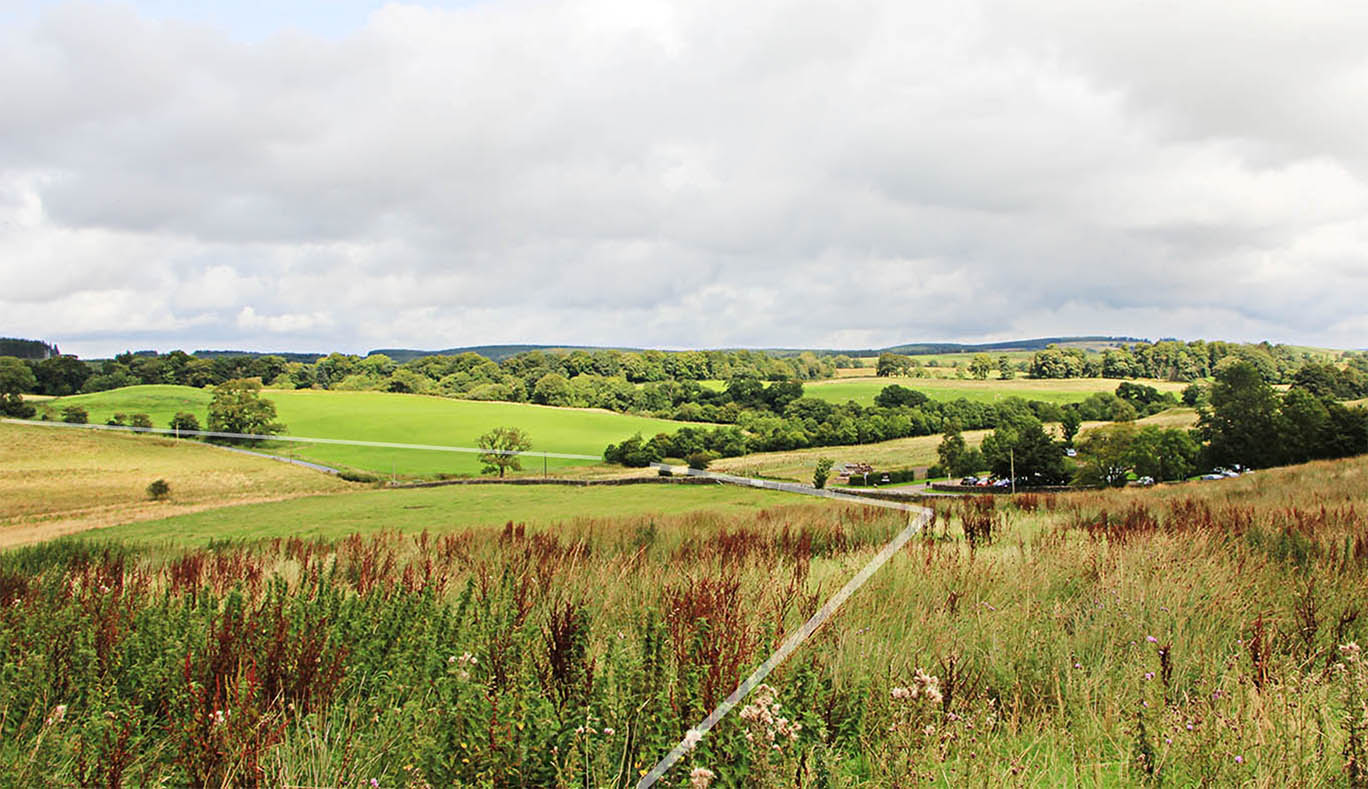
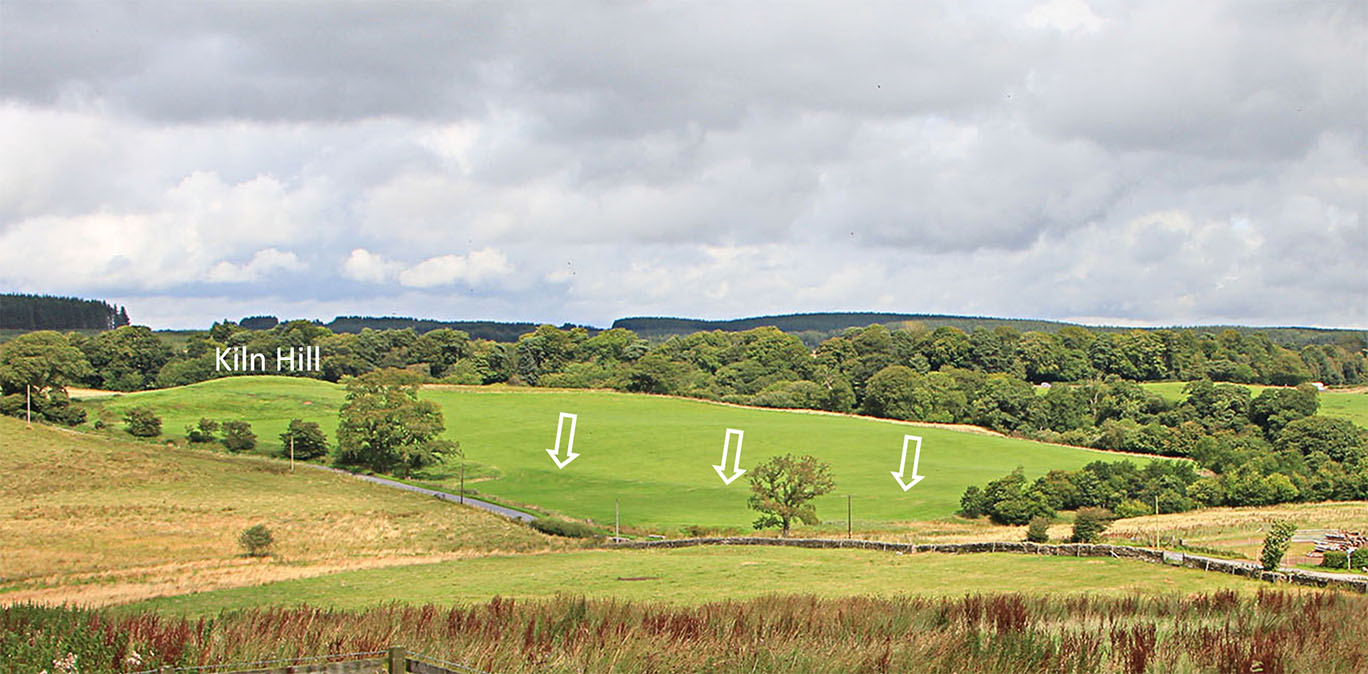
View from Birdoswald Fort north gate. Midgeholme Moss is straight ahead in valley bottom. I would suspect it is a shadow of its former self and was possibly even open water in Roman times. There is clear evidence of modern drainage ditches to dry it out. A route via Kiln Hill makes much more sense...... |
Click for larger view |
 |
Route around Midgeholme Moss First clue: visible is in the Lidar image is a very clear terrace-way leading away from the gate in the above picture heading, not for Bewcastle, but in the direction of modern car park i.e. north-east. Second clue: a faint cutting heading down to the beck to the east of the modern bridge. This is actually clearer on the ground. Third clue: a very pronounced agger/cutting heading north-north-west from the beck up to the dog-leg in the modern road.. Fourth clue: the modern road chicanes to the left (west) derived from the Roman road which was now heading back for the main Bewcastle alignment. Fifth clue: visible in the aerial photo is the dog-leg of the road rejoining the alignment north of the B6381. This dog-leg is clear on the ground too - see later. |
Click for larger view |
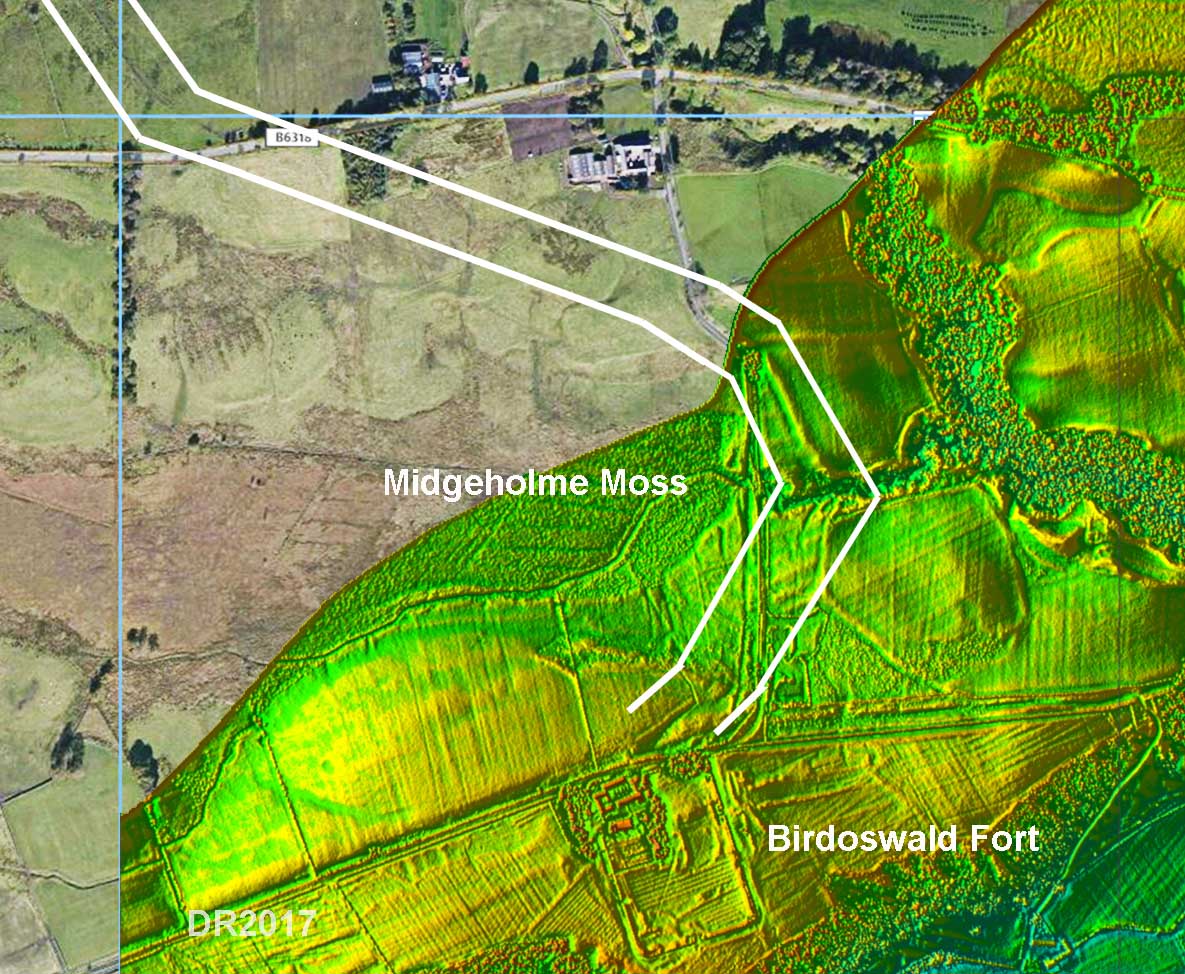 |
Route Map - Midgeholme bypass At first I thought the modern bridge was the Roman route but the evidence for the road east (downstream) of the modern bridge is pretty convincing. |
Click for larger view |
 |
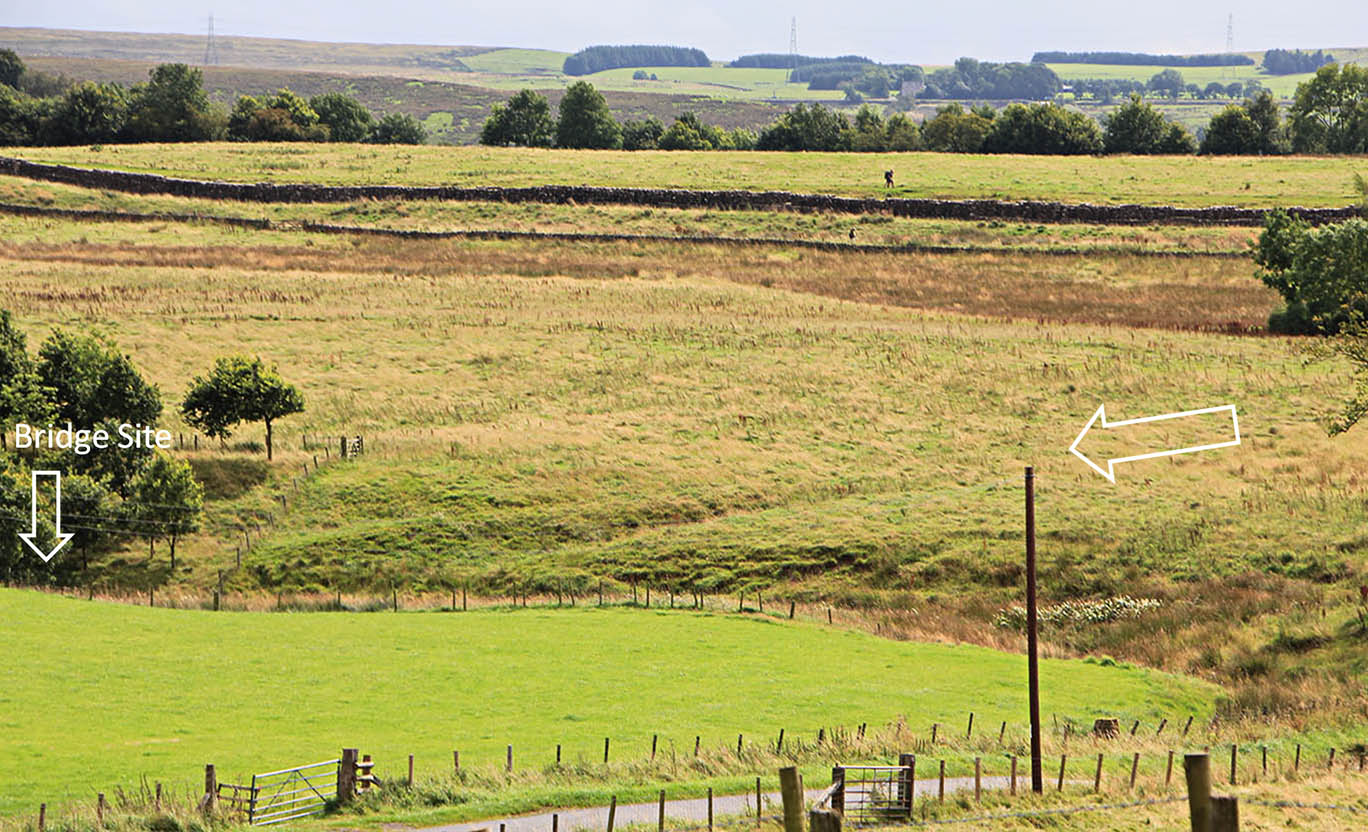
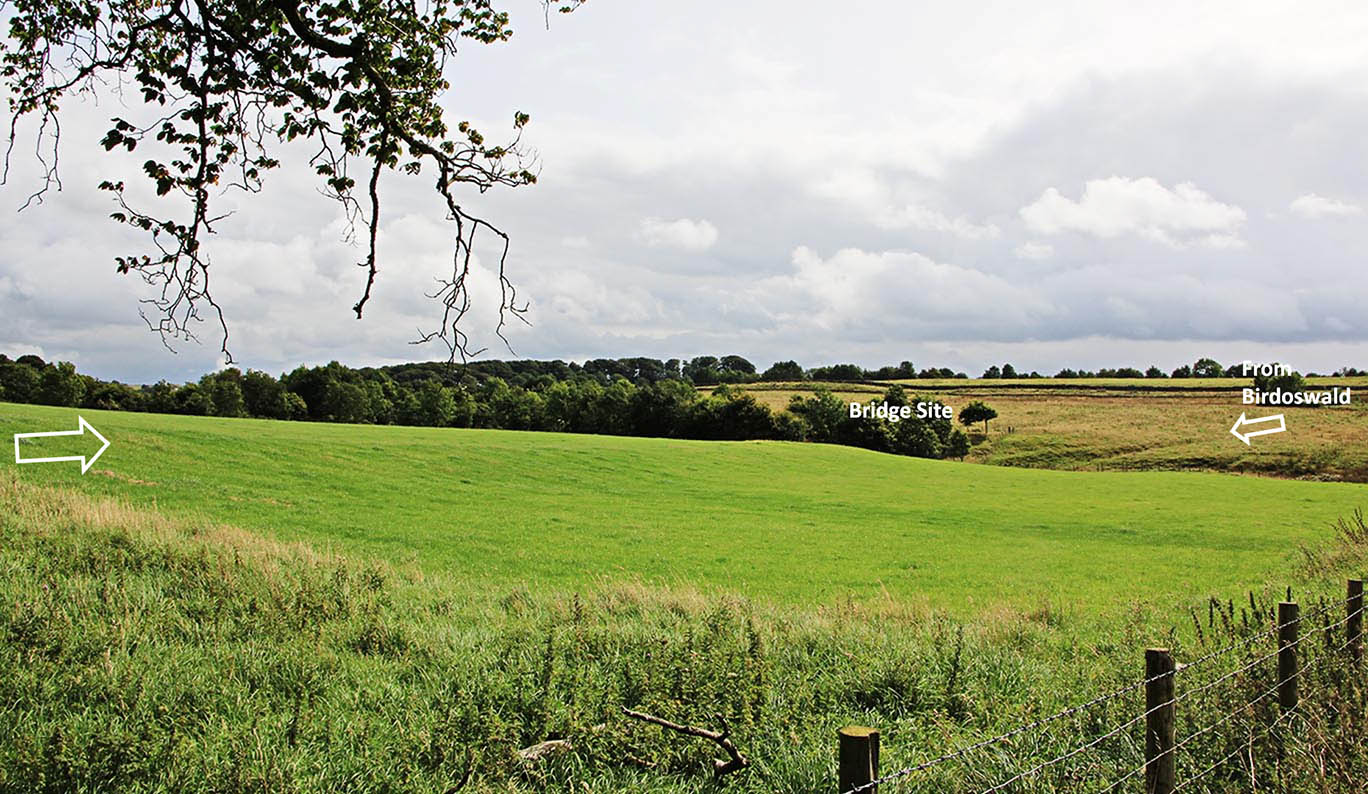
View from Birdoswald - actual route This is the same spot as above but now looking in the direction of the car park. The incline down so clear in the Lidar data turns before the car park to head down to the beck downstream of the modern bridge. |
Click for larger view |
 |
Agger/Cutting approaching the stream from Midgeholme Moss. Very clear and obvious descent. The actual bridge site is marked by the trees. |
Click for larger view |
 |
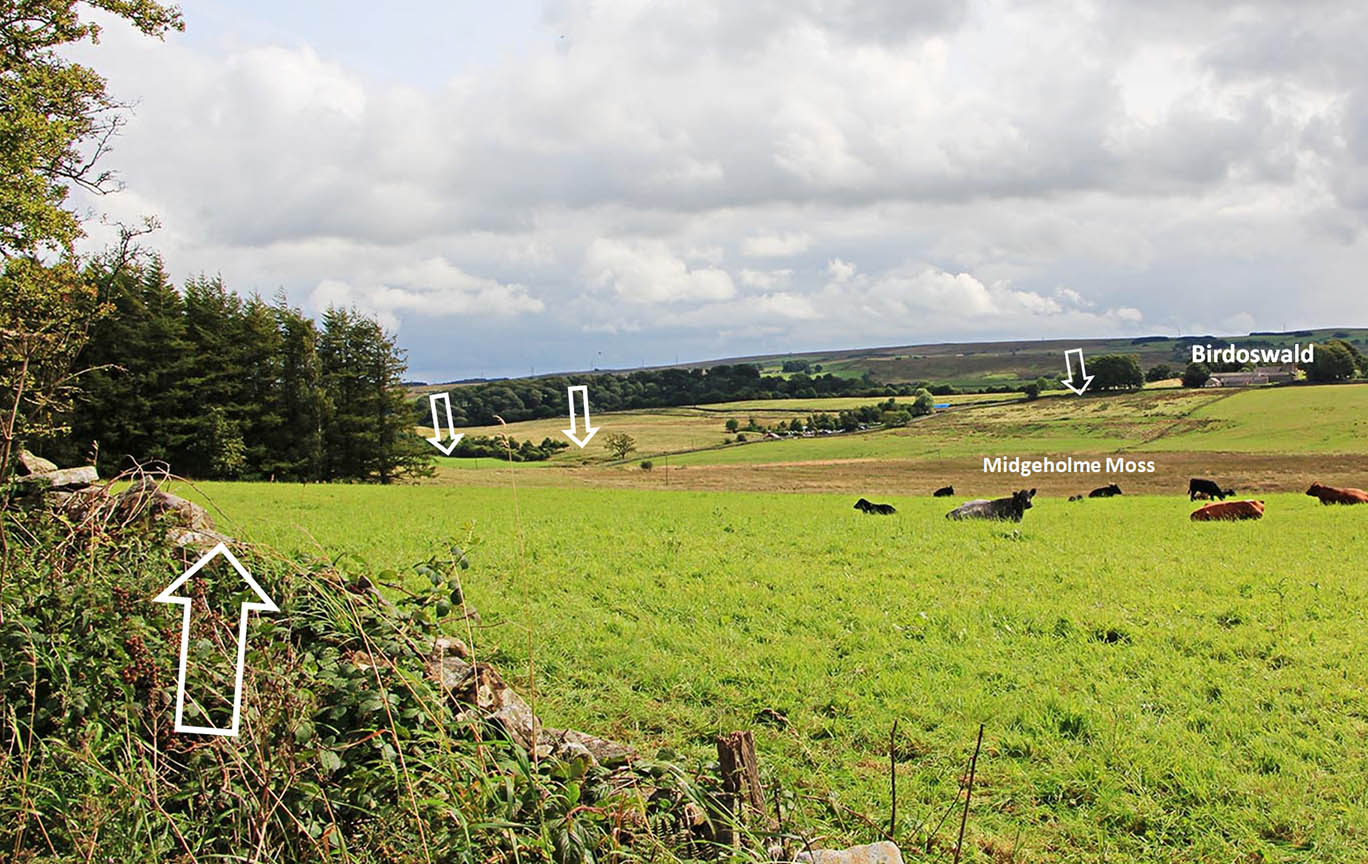
Ascent agger from stream towards Kiln Hill The Roman road agger is very impressive and heads for the modern road where it swings to the west. The Roman agger might be slightly higher initially. |
Click for larger view |
 |
Agger ascending from Bridge Site This is a big agger - much more obvious in reality than in photographs. |
Click for larger view |
 |
View back from B6381 The left arrow points towards the dog-leg in the modern road where it coincides with the Roman road. Absolutely no evidence for a road across Midgeholme Moss. |
Click for larger view |
 |
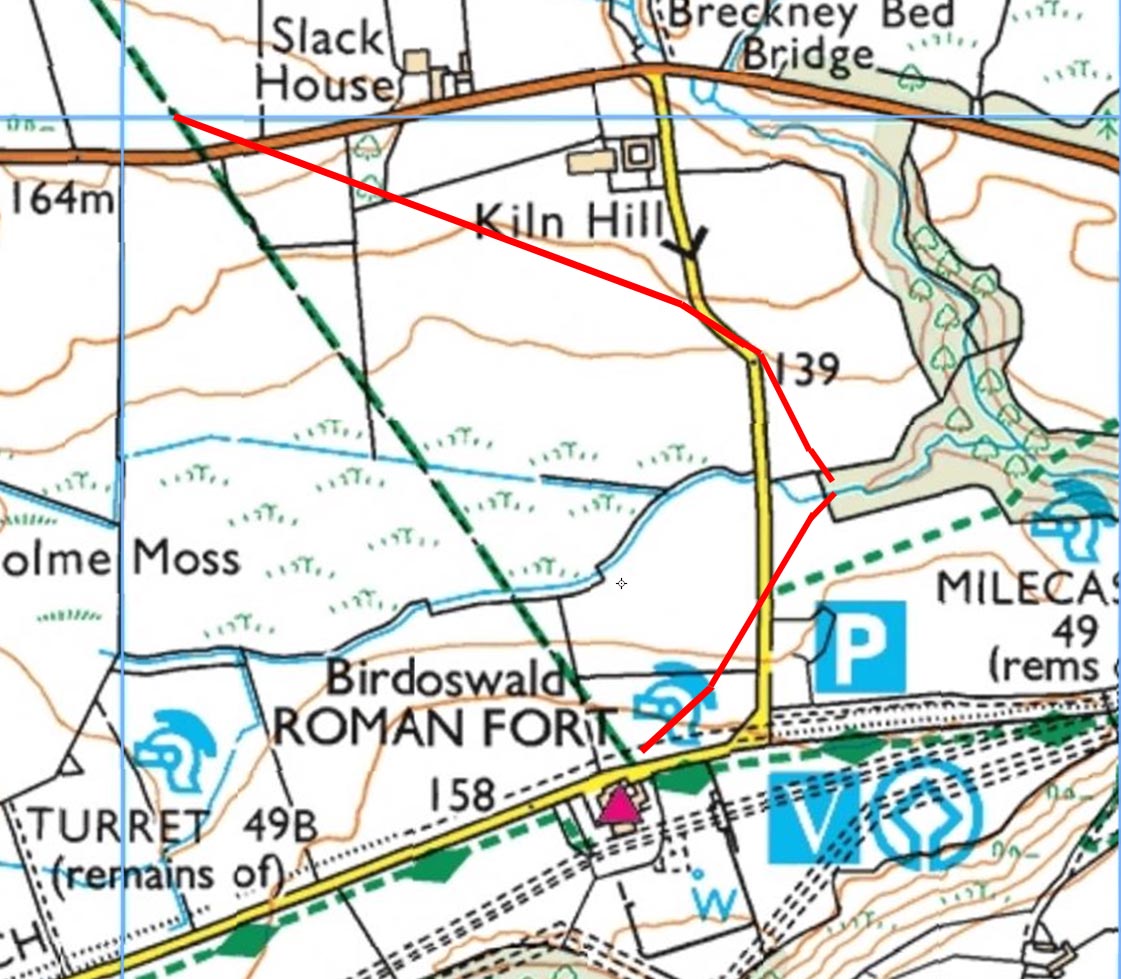
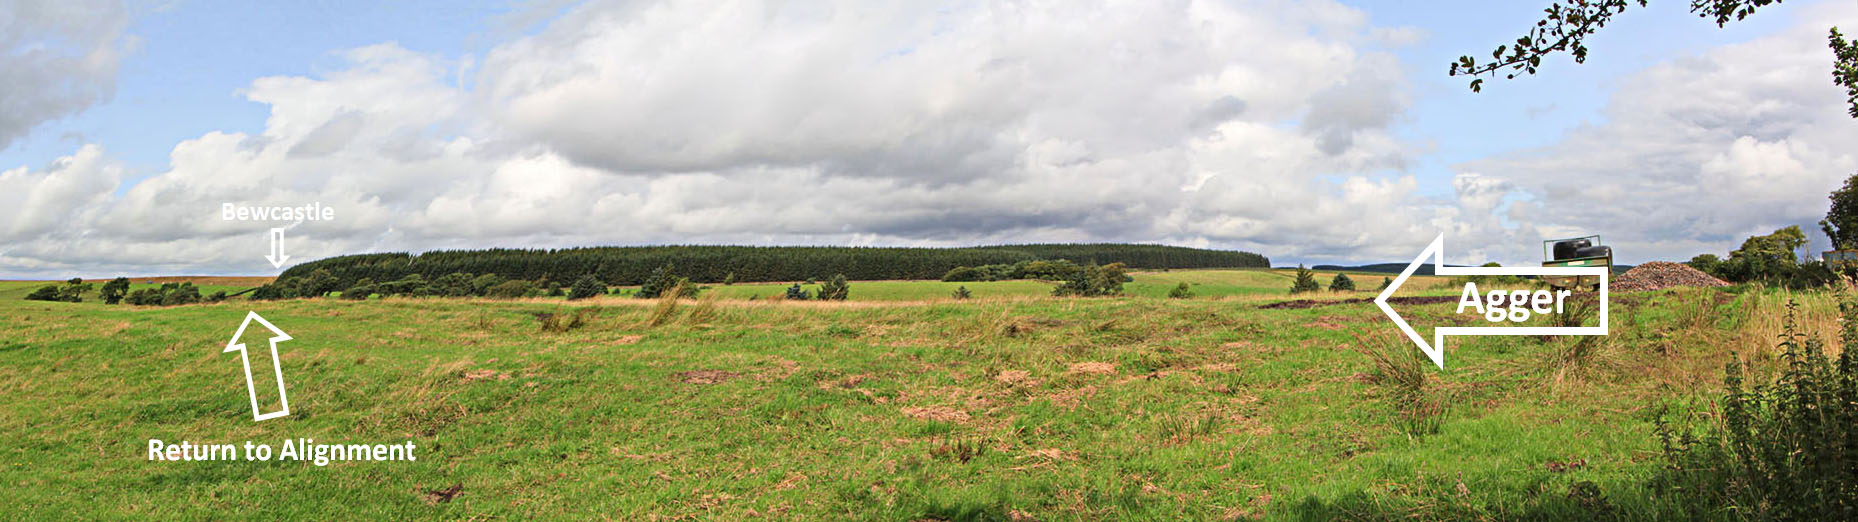
Return to Main Alignment - north of B6381 The agger coming in from the Kiln Hill route is very pronounced. It is also visible in the aerial plan image above. It turns at the left arrow and heads off to Bewcastle on the main alignment set out from Birdoswald's north gate. This length of agger is around 2 feet high. |
Click for larger view |
 |
Lidar and Aerial image + Map The line of the OS mapping is not quite correct here. The road adopts typical Roman engineering by using a dog-leg of two straights to get to where it needed to be i.e. the east gate of Bewcastle fort. Note how the last alignment is actually parallel to the main alignment from Birdoswald - again a very typical Roman setting-out strategy. |
Click for larger view |
 |
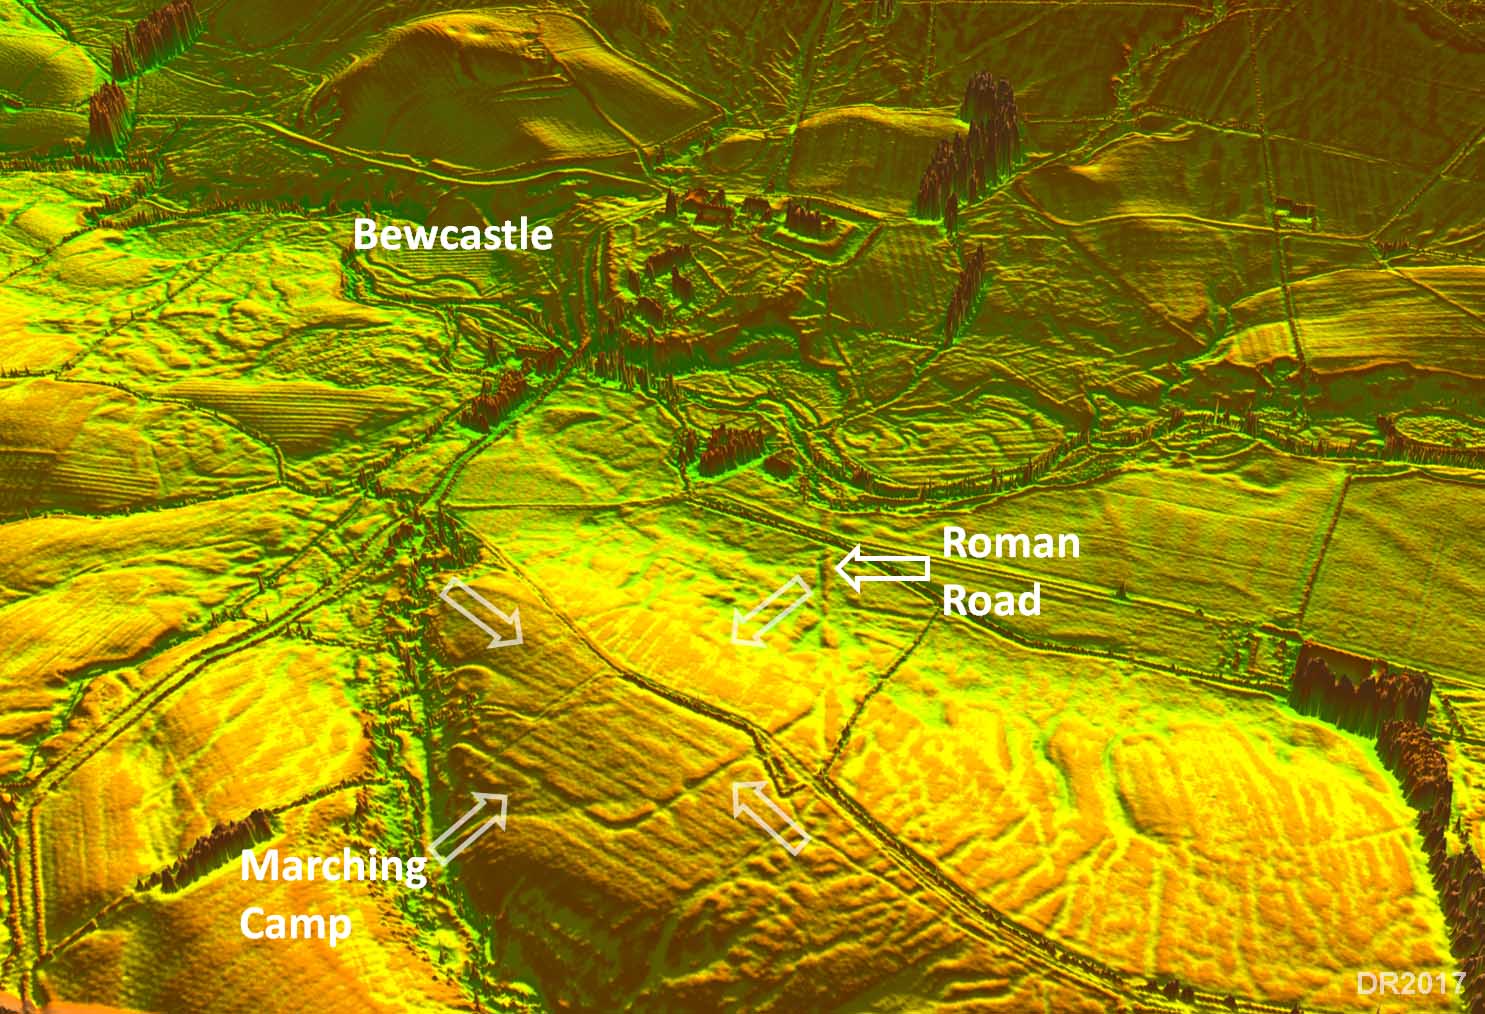
3D Lidar Image - Temporary Marching Camp Discovered by Bryn Gethin, this marching camp is so obvious it is actually visible on aerial photography but for some reason escaped detection until the advent of Lidar. Several entrances are visible. Note how the road skirts its east corner almost certainly indicating they were contemporary.
|
Click for larger view |
 |
Lidar Image - Bewcastle Fort The fort comprises a very odd hexagon shape and appears to be a religious site as its probable name, Fanum Cocidii, means "shrine of Cocidus". The road arrives at the east gate of the fort. Today the site is remote from civilisation but must have still been important long after the Romans departed, witness Bewcastle Cross and the Norman castle built into the north-east corner of the Roman fort. There is a local society - Bewcastle Heritage Society. |
Click for larger view |
 |
|
|
|
Return to Cumbria Roman Roads homepage Last update January 2018 |
© David Ratledge |